Python tips and tools

![]()
![]()
![]()
![]()
Howdy! I present you some notes meant as a companion to the Python tips and tools talk for the Superconducting Qubit Technology school at Benasque 2023.
Since there are abundant online resources to learn Python, this document is quite succint and schematic. I tried to keep the files simple enough so that the essence of a Python project can be understood, but rich enough so that you, hopefully, learn new things! (No, we are not going to print "hello world" or explain for loops).
Table of Contents
- Getting started
- Python basics
- Tools
- Bit more advanced stuff
- Other things to look into
- Online resources
Getting started
Conda
The first thing we should do when working on a new project is to create a virtual environment that suits our third-party library needs (with their corresponding versions), unless we already have one. I personally use the light version of conda, miniconda, which only installs the standard Python libraries. Then you can always install whatever you need in a new environment to keep it all clean and tidy. Other alternatives to conda exist, like venv (part of the standard library), Poetry and Pipenv.
So, we start by creating and activating a new environment
$ conda create -n env_name python==3.10
$ conda activate env_name
Create a project and initialize git
Next, we create our project folder and initialize git inside it, so we can use version control.
$ mkdir my_project
$ cd my_project
$ git init
or, instead, we can clone this repository
$ git clone https://github.com/pablovegan/Python-tips-tools.git
Note: be sure to push and pull your changes to and from the cloud (e.g. Github or Gitlab) when switching between different devices (for example, your desktop computer and your laptop). Otherwise, you can have merge conflicts and, trust me, you don't want that...
Pip and PyPI
Once Python is installed, we can use either pip or conda to install new libraries in our environment. pip downloads packages from the PyPI repository (Python Package Index), which usually has more libraries than the Conda repository.
To simplify our life, we will install the third-party libraries we need from a .txt file named requirements-dev.txt, which also installs the dependencies in the requirements.txt file (intended just for users of the library, not developers).
$ pip install -r requirements-dev.txt
Jupyter notebooks
If we also want to run jupyter notebooks, we must install the package ipykernel:
$ pip install ipykernel
Text editor or IDE
I'm a Visual Studio Code (VSCode) enjoyer because it is free, lightweight and has lots of useful extensions, but you may also try other IDEs and editors like PyCharm, Sublime or Vim (for the nostalgic).
Here are some of the extensions I use in VSCode:
One tip for VSCode: you can hide cache folders from the file explorer in Settings -> Files: Exclude.
Python basics
Project structure
Once we have a folder for our project, we equip it with the following structure:
├── README.md
├── pyproject.toml
├── requirements.txt
├── ... other files ...
├── docs
├── mypackage
│   ├── __init__.py
│   ├── vector
│   │   ├── __init__.py
│   │   └── vector.py
│   └── linearmap
│       ├── __init__.py
│       └── linear_map.py
├── tests
│   ├── __init__.py
│   ├── test_linear_map.py
│   └── test_vector.py
└── examples
    └── example.ipynb
First, we find the README, which contains whatever useful information the author of the repository wants to transmit us. Usually it begins with a short description of the package, and follows with sections on how to install it, a quick usage guide, references, how to contribute and the license (see README_template.md for an example).
Next we find pyproject.toml, a configuration file with metadata about our project and configuration options for the tools that we use during development (e.g. linters and formatters). Usually you can copy configuration files from other projects (like this one) and tweak them to fit your needs.
Third party dependencies for our package are specified in the requirements.txt file, ideally with the version of each library to avoid conflicts with updates or older versions. The resting developer tools that we'd like to use are added in the requirements-dev.txt file. Tip: you can specify the dependencies inside the pyproject.toml file to avoid having extra files.
After a bunch of other files, we find our main package, with all our Python code organized in folders. Sometimes the package can be found inside a source folder, src, in a similar way to other programming languajes (like Java), but in Python is not really necessary so we can skip it.
In the tests folder we store the code needed to assert that our library is working as intented to. This shouldn't be mixed with the examples folder; sometimes we tend to test our code in jupyter notebooks, but it is better to define a set of tests that we expect our library to pass every single time, and then just use it for whatever examples we want.
For the moment, we will not worry about the docs folder (files to create documentation) or the .github folder (contains workflows) found in this repository; we will get to it in the advanced stuff section.
Packages or libraries
A package or library is a collection of Python .py modules organized in directories. The main directory is the package and the subdirectories are its subpackages, with their names following the lowercasenames convention, without underscores.
As you may have noticed in the project structure, every folder inside our package has a __init__.py file (read "dunder init"). The code inside it will be called whenever we import the library. Usually, it only contains imports of functions or classes from other .py files or directories at the same level, but it can include any piece of code.
The tests folder can also contain a __init__.py file, but we can leave it empty since we are not going to import the tests package.
Modules
Simply, a module is a .py file consisting of Python code. A module can define functions, classes and variables...
Python modules should more or less follow this structure:
- Module docstrings should appear at the very beginning, just before the imports.
- Imports should follow this order:
__future__standard_librariesthird_partyfirst_party-
local_folderwith each group separated by one empty line. Also, one should not import from more than one library per line.
Tip: You can use
isortto sort automatically all your imports. -
Module constants, separated from the imports by two empty lines. Constants should follow the
UPPER_CASE_WITH_UNDERSCORESnaming convention. - Functions, separated again by two empty lines. Function names should follow the
lower_case_with_underscoresconvention. - Exception classes.
- Normal classes. Classes names should stick to the
CapitalizedWordsconvention.
There is no exact rule on how much code should be in each module, but, ideally, each module should have one purpose (as with functions). For example, the purpose of our modules vector.py and linear_map.py are defining the Vector class and creating some linear transforms for those vectors with the LinearMap class and its subclasses, respectively.
Objects and classes
Python is an object oriented language; everything in Python is an object (even packages!), i.e. any data with a state (attributes) and defined behavior (methods). Attributes are values associated with an object; they are usually referenced by name using dotted expressions.
A class is a template for creating user-defined objects and normally contains methods which operate on instances of the class. Methods are functions defined inside a class body. (For an in-depth introduction to classes in Python see).
Every class in Python has, ultimately, type as a base class (more on subclasses and inheritance later on). When we instantiate a new object of a certain class (for example, obj = myclass()), the __call__ method of type is invoked in the background, which in turn calls the __new__ and __init__ methods: the former creates a new empty object of the class, while the latter initializes the object.
class Friend:
    """The class represents a friend with their main interests."""

    def __init__(fav_movie: str) -> None:
        """Method to initialize our friend with a 'fav_movie' attribute."""
        self.fav_movie = fav_movie


iris = Friend(fav_movie="Shrek")
print(f"{iris.fav_movie = }")  # access the fav_movie attribute of iris
Tip: __init__ should initialize all the attributes of the class, even if they are defined inside other methods, case in which you just initialize the attributes to None. This allows anyone to see at a glance all the attributes of your class without having to read through all the code.
In Python, methods that start and end with the double underscores are called special methods (also called magic methods or dunder methods). Special methods are called internally by Python, so they are not meant to be invoked directly by you. For example, when you add two integers using the + operator, Python is implicitly calling the __add__() method inside the int class.
Another common naming convention is related to the fact that Python doesn’t distinguish between private, protected and public attributes like Java and other languages do. In Python, all attributes and methods are accessible, so to distinguish the ones for internal use only from the ones intended for users (public API), we begin this "private" attributes with an underscore. An example is the _get_inverse() function in our linear_map.py module. In the user interface (API), the inverse is accessed via a "public" attribute inv_matrix rather than the "private" method.
Two important properties of python classes are inheritance and polymorphism. Inheritance allows us to create a subclass that can access the methods of the parent class (or parent classes in the case of multiple inheritance). Polymorphism allows different classes to use a single method, operator or object, to represent different types in different scenarios; for example, __add__() changes its functionality depending on whether the summed objects are integers, strings or lists.
Inheritance leads us to the interesting concept of abstract classes: classes that are meant to be inherited but never instantiated. These abstract classes allow us to define a template with abstract methods that we can later code explicitly in each of its subclasses. To create an abstract class, we subclass Python's Abstract Base Class (ABC), which allows the use of the @abstractmethod decorator to indicate that we left a method undefined on purpose:
from abc import ABC, abstractmethod


class Shape(ABC):
    """Shape abstract class."""

    @abstractmethod
    def area(self):
        """Calculate the area of the shape."""
        pass

    def print_area(self):
        """Print the area of the shape."""
        print(self.area())


class Square(Shape):
    """A square shape."""

    def __init__(self, side: float) -> None:
        self.side = side

    def area(self):
        return self.side * self.side
linear_map.py module of our library implements the Rotation and Shear transforms as subclasses of the abstract class LinearMap.
Tip: improve object-oriented programming applying the SOLID principles.
Last but not least, we need to be aware of that Python objects fall into two categories: mutable or immutable. An immutable object is the one that cannot be changed after it is created; even when you think you are changing the object, you are really making new objects from old ones. Immutable objects include numbers, strings, and tuples. Almost everything else is mutable, including lists, dicts, and user-defined objects. Mutable means that the value has methods that can change the value in-place. To learn more about this, check out the example notebook 3-mutable-objects.ipynb.
Variables
A Python variable is a symbolic name that is a reference or pointer to an object. In Python, unlike other programming languages like C, different variables can point to the same object/memory address. Each object has a counter that keeps track of how many variables (names) have been bound to this object. When an object runs out of references, it is no longer accessible and Python will reclaim the allocated memory so it can be used for something else.
And how are variables passed to functions? If you have heard about the pass by reference and pass by value paradigms, you may be wondering which one Python follows. Well, the truth is... neither! Python passes variables by assignment; that is, when you call a Python function, each function argument becomes a (local)variable to which the passed object is assigned. Thus, a local and a global variable can point to the same object in memory, with important consequences if the object is mutable.
In general, variable names and attributes should follow the lower_case_with_underscores naming convention (as with functions). Only constants defined on a module level should be written in UPPER_CASE_WITH_UNDERSCORES. Variable names should be readable and meaningful, avoiding undescriptive names like single letters or cryptic abbreviations.
Type hints
Python is both a strongly typed and a dynamically typed language. Strongly typed means that the type of an object doesn't change in unexpected ways.
In a dynamically typed language, the interpreter does not assign a type to the variable per se because the type can change at runtime. If you ask a variable its type, it will give you the type of the object it is currently assigned to at that moment. Therefore, Python manages memory dynamically, which allows for flexibility in programming, but with a price in performance.
Nonetheless, recent versions of Python allow one to add indicative "static" type hints to our variables. For example
a: int = 3
b: float = 2.0

def shouting(text: str) -> str:
    return text.upper() + "!!"
They can be helpful to make the code clear, create documentation or even catch errors using tools like mypy.
More elaborate type hints such as Callable or Sequence can be found in the typing library. Note that, after Python 3.10, the operator | can be used as an "or" between different types (same use as Union). For example, this function accepts either a float or an integer and outputs an integer.
def float_to_int(variable: float | int) -> int:
    return int(variable)
Docstrings
Quoting Documenting Python Code: A Complete Guide:
When you write code, you write it for two primary audiences: your users and your developers (including yourself). Both audiences are equally important. If you’re like me, you’ve probably opened up old codebases and wondered to yourself, “What in the world was I thinking?” If you’re having a problem reading your own code, imagine what your users or other developers are experiencing when they’re trying to use or contribute to your code.
Probably, at some point in your life, you had to go through —or even worse, work on— some awful code, so you are hopefully convinced of the necessity of writing clean and well explained code.
There are two ways to explain your code: comments and documenting. Comments can be found inside the raw code files and their target audience are developers of the Python code. They can explain a tricky step in an algorithm or a bug fix. That said, ideally, functions should be readable and require few to no inline comments explaining what the code does.
Documenting code is describing its use and functionality to your users. While it may be helpful in the development process, the main intended audience is the users. Documentation is often found in a website and inside the code as strings, also known as docstrings.
Docstrings should always be added to your modules, classes and functions. The idea when coding is to make simple functions with just one purpose and document them clearly: summarize the function; indicate its arguments, return values and exceptions raised; add notes, examples and references. Remember that we learn better from the concrete, so adding examples to your documentation is always a good idea:
"""
Examples:
    Use case of our library:

    >>> some executable code block
    the result
"""
Note: An easy way to check if the example code gives the expected result without jumping into a jupyter notebook to test it is using the tool doctest, which is part of the standard library. Simply, from the command line, execute
$ python -m doctest mypackage/linearmap/linear_map.py
These docstrings can follow different conventions; one of the most popular ones is the Google style. I personally like it because it is very clear and compact (Numpy style, in contrast, occupies more lines).
To create them in a fast and easy way, I use the autoDocstring extension for VSCode. Once our function is type annotated, we type """ and click in Generate Docstrings; it will automatically create the template using the annotated inputs and outputs of the function, as well as the exceptions raised.
Tools
Testing
How do we know if the functions in our library work as they are supposed to? Sure, we can always have a bunch of jupyter notebooks lying around, but there is a better way: unit testing. Unit testing is a method for testing software that looks at the smallest testable pieces of code, called units, which are tested for correct operation. Usually in Python, units are functions and class methods.
Testing is a world on its own, especially in the so-called Test Driven Development (TDD), and we will barely touch the surface in this demo... but it is enough for the needs of most physicists. Just as a sneak peak: we can test how different units fit together (integration testing), test a whole application (system testing), test in different operating systems, etc.
The tool we will use for unit testing is pytest. To keep our code organized, outside our library we create another folder called tests. Inside it, we place different modules test_*.py; in our case, we have one for each subpackage: test_vector.py and test_linear_map.py. Inside each of these, we test all the functions and methods in the module (don't forget to test the exceptions as well!). The syntax is really easy, you just need to use the @pytest.mark.parametrize decorator to tell pytest which inputs and expected results you want to test. For example, to assert that 1+2=3 and 3.0-1=2.0:
@pytest.mark.parametrize(
    ("arg_1", "arg_2", "result"),
    (
        (1, 2, 3),
        (3.0, -1, 2.0),
    ),
)
def test_sum(arg_1, arg_2, result):
    assert arg_1 + arg_2 == result
To run all the tests inside the tests folder simply run, from the command line,
$ pytest tests
$ pytest tests/test_vector.py
Note: In the workflows section we will see how to automate testing.
Tip: sometimes it is easier to test functions generating random inputs and ensuring they fulfill certain properties (called property-based testing or fuzzy testing). This can be done with hypothesis, a library used to test, for example, NumPy.
Debugging
How many times have you found yourself adding dozens of print() statements to your code to catch an error? You are not the only one... But turns out there is a much better way: use the debugger in your IDE. You can add breakpoints, execute single lines, see what value each variable has, step into the functions inside your library, see the call stack... A good idea is to debug your tests, since they, ideally, are the final check to see if your code is really working.
Note: if you don't have an IDE at hand, you can run, through the command line, The Python Debugger, which is included in the standard library.
Timing
Even if our code runs without errors, it might not be very useful if it takes too long to do the task. To benchmark our code and find possible bottlenecks, we can use the library timeit, which executes a piece of code a number of times and returns the CPU time taken to run it. As an example, we can run the script 7-timing.py to benchmark how long it takes to sum two vectors:
$ cd examples
$ python 7-timing.py
Alternatively, we can use the magic function %timeit inside a jupyter notebook to benchmark a line of code (%%timeit for a cell). You can find an example in 5-jit-compiler.ipynb, where we compare the speed of a determinant and its just-in-time compiled version.
Profiling
Profiling allows us to disaggregate the time taken to run a function into its different components. For example, when adding two vectors, does it take longer to check that the summand is a vector instance or to actually sum the two vectors?
To profile our code we can write a simple script using the Profiler class from the pyinstrument library. To get a sense of how profiling works, you can run the script 8-profiling.py:
$ cd examples
$ python 8-profiling.py
Linting
Linters like Flake8 or Ruff (Ruff is very very fast and implements a lot of checks) help us find mismatches between our code and the conventions stablished by the python community in the PEP8 guidelines. In summary, an indispensable tool for a programmer.
Ruff can be easily run from the command line to highlight all the errors in our library
$ ruff check .
$ ruff check mypackage/vector/vector.py
Ruff, unlike other linters, also has the option to fix some of the problems encountered in the code
$ ruff check --fix mypackage/vector/vector.py
You can configure the line lenght, what rules to ignore and other options in the pyproject.toml file. For example,
[tool.ruff]
line-length = 100
select = ["F", "E"]
Formatting
Keeping track of all the errors and fixing them can be painful... This is where automatic tools to format the code enter. The two most popular are autopep8 and black. I prefer black because it requires less configuration. To format our library simply type in the command line
$ black mypackage
$ black --line-length 100 mypackage
Formatting can be done automatically in VSCode, just add this code to a settings.json file inside a .vscode folder in the main directory
{
    "editor.formatOnSave": true,
    "python.formatting.provider": "black",
    "python.formatting.blackArgs": [
        "--line-length",
        "100"
    ],
    "[python]": {
        "editor.defaultFormatter": null,
        "editor.insertSpaces": true,
        "editor.tabSize": 4,
        "editor.formatOnSave": true
    }
}
As with Ruff, Black configuration is written in the pyproject.toml file:
[tool.black]
line-length = 100
Tip: install black[jupyter] to format code inside notebooks.
Type checker
The most popular type checker is mypy. Provided that we type hinted our functions and variables, this tool checks any mismatches between the expected input and output types and the actual ones. It can also highlight deeper errors in your code structure, like violations of Liskov substitution principle.
$ mypy mypackage
mypy in pyproject.toml:
[tool.mypy]
warn_return_any = true
warn_unused_configs = true
Note: sometimes it complaints too much so you may just turn it off...
Tip: this is not the only use of type annotations. You can also check that the correct types are inputed when innitializing an object with pydantic.
Bit more advanced stuff
Code acceleration
Python is an interpreted language, which means the source code is executed directly without compiling the program into machine code. It is instead compiled into bytecode (.pyc files), which is run by a Python interpreter. There are multiple interpreters, the most common being CPython, which is programmed in C, but there are options written in Rust (RustPython) and even Python itself (PyPy)!
One disadvantage of interpreted languages over compiled ones is that they are slower. But no need to worry, since there is a wide range of tools for accelerating our code:
- Just-in-time compilers: Numba, JAX and PyPy (an interpreter with a JIT compiler).
- Parallelization with
pathos.multiprocessingandmpi4py(Message Passing Interface for Python). - Extend Python with C code: Cython (the
cythonbuilderlibrary makes our life easier). - Call Rust functions from Python.
Just-in-time compilers are one the most popular tools in Python nowadays, specially with the increasing interest in the library JAX. You can see a simple example of JIT with Numba in the 5-jit-compiler.ipynb notebook.
Installing the library
Before we install our local library, we need to specify some metadata and configuration settings; this is done in the pyproject.toml file (check out the setuptools documentation). Then we can use pip with the editable option -e to install our library (where . points to the current —main— folder):
$ pip install -e .
Tip: you can install the library together with the optional dependencies specified in pyproject.toml with
$ pip install -e .[dev]
Creating documentation
If you want to create nice looking documentation and then upload it to a website (for free in Github Pages) you can follow this tutorial using mkdocs. As a quick no-brainer guide:
-
Add a
docsfolder. Usually, it contains anindex.mdmarkdown file that copies whatever you have in theREADME.mdand displays it as the main page of the documentation website. It may also contain additional markdown files that will make different sections of the website (each file is assigned a section inmkdocs.yml). -
Create a config file
mkdocs.yml. You can simply copy the file in this repo and change the basic info like the site's name or URL. -
To create the documentation for our functions and methods using the docstrings, we use the script
gen_ref_nav.py. Inside the script, you only need to change the name of the folder containing your library in thePATH_LIBRARYvariable. Again, you can simply copy the docs folder in this repo and modify the script. -
Add a Github workflow to build and deploy the website in Github Pages. You can just copy the workflow in
.github/workflows/documentation.yml(more on workflows later on). Whenever you push changes to Github, the documentation will be updated. -
(Optional). Before uploading our documentation to the website, we can build it and host it locally on our computer to see the final result. Simply run from the command line
$ mkdocs serve --config-file docs/mkdocs.yml
This repository's documentation can be found in https://pablovegan.github.io/Python-tips-tools/.
Building and uploading to PyPI
When we install packages using pip we are actually downloading them from the PyPI repository (Python Package Index). Anyone can upload packages to PyPI... but be careful, since the package will stay forever in the repository. If you want to play with the uploading process you should always upload the package to https://test.pypi.org/.
To upload our library we use the Python package twine. Here is a short guide on how to build and upload our library:
- Build our library using
setuptoolsand thepyproject.tomlconfiguration file:$ python -m build - Upload the built library to TestPyPI. You will need to enter the user and password of your TestPyPI account (different from your PyPI account)
$ twine upload -r testpypi dist/* - Once you are confident that you want to upload your package to PyPI, use the command
$ twine upload dist/*
Once the package is in PyIP, you can install it in your environment:
$ pip install python-tips-tools
Note: the process of uploading the package to PyPI can be automated with a workflow.
Automating boring tasks with Github workflows
Ordinary tasks in a developer's day such as testing in multiple operating systems and Python versions, releasing packages and uploading them to PyPI, updating the documentation in a website, etc., can all be automated using workflows. Most cloud repositories like Github or Gitlab have them available and are really easy to use (at least the basic ones).
In this repo, I added two Github workflows: one to test our library in a linux machine (provided by Github) with Python version 3.10 and another to upload the documentation to Github Pages. The workflows can be found under the folder .github/workflows in *.yml files. As an example, the structure of the test.yml file is:
- Apply the action when we git push to the repository.
- Create an Ubuntu Linux machine with python 3.10 installed.
- Install
pytestas well as the dependencies in therequirements.txtfile. - Run the tests inside the
testsfolder usingpytest.
The green tick near the commits shows that the workflows were successful.
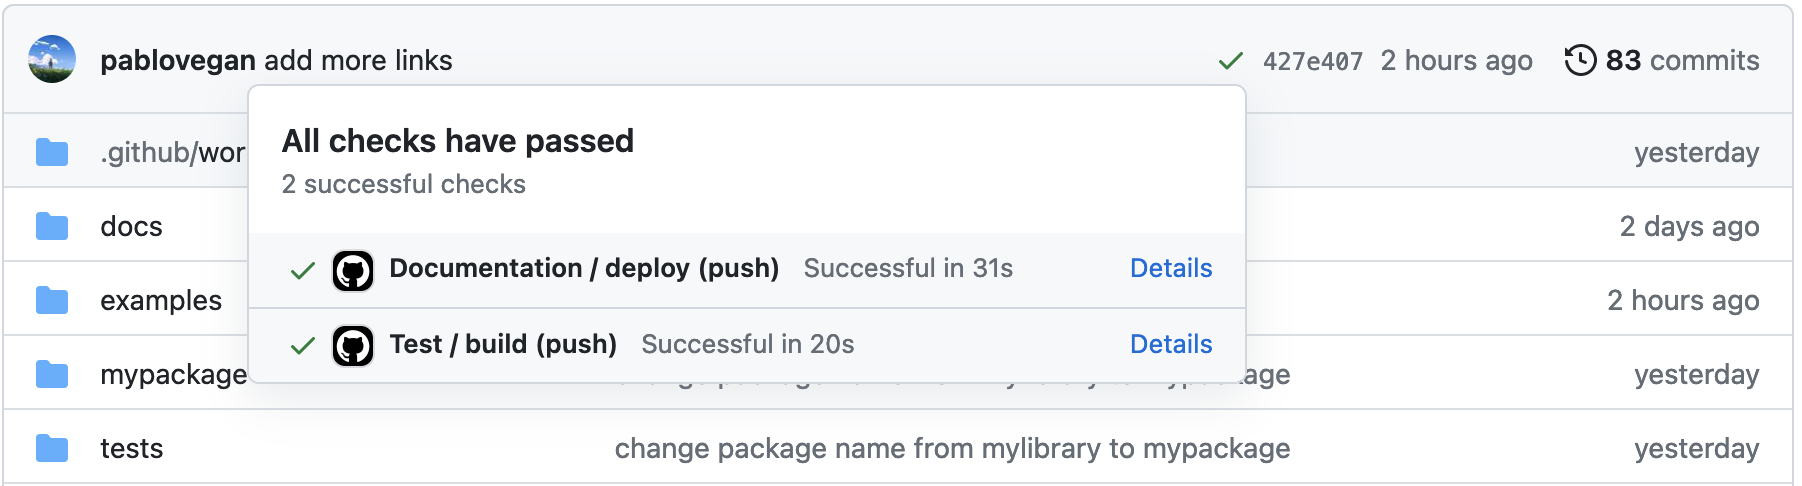
Cool tip: we can add a badge at the beginning of our readme to show that the tests either passed or failed (this is updated automatically each time the tests are run).
Command line interface
Command line interfaces (CLI) allow us to invoke functions or scripts through the command line without using python -m to execute a module. To do this, we need to create a script contain the CLI (for example, __main__.py) and set it as the entry point in our pyproject.toml file
[project.scripts]
vector = "mypackage.__main__:main"
Python's Standard library provides a package to handle command line arguments to create this CLIs: argparse. You can follow along this tutorial to learn how to use it.
As an example, we can use the command vector —which calls main() inside __main__.py— to create and save a vector to a file:
$ vector 1 2 --save vector.pkl
Vector (1.0, 2.0) created!
Vector pickled in data/vector.pkl!
Other things to look into
- List comprehensions. They generally replace lambda functions,
map()andfilter(). - Exception handling:
try-exceptstatements. They work very well with custom error classes. An example can be found in the4-exceptions.ipynbnotebook inside theexamplesfolder. - Iterators and generators: look up the functions
iter()andnext(), and the keywordyield. Generators are a central feature of Python and they are used in coroutines and context managers. - Function and class decorators: decorators are a simple sintax to transform certain functions or classes. An example of an interesting decorator is
@classmethod, which allows us, for example, to initialize classes in alternative ways without overly complicating the__init__method. - Dataclasses: a concise syntax for classes containing mainly data, similar to structures in C. The library Pydantic implements automatic type checking when initializing a dataclass.
- Pre-commits: pre-commit hooks allow us to do certain actions before commiting changes with git. For example, we can lint our code with Ruff and fix it with Black whenever we make a commit.
- Logging: keep a record of what is happening in your program.
- Literals, keywords and builtins
Online resources
Most of the material in this repo is covered in the excelent course Python: Coding Guidelines, Tools, Tests and Packages. I also encourage you to watch the sublime talks by James Powell Objectionable Content and So you want to be a Python expert?
Of course, free online resources are abundant; to name a few I use frequently: - Real Python - Programiz - Dive into Python 3 - Machine learning mastery - Libraries' documentation